Google Classroom is one of the most exciting learning platforms around today. During remote learning, it allows you to deliver assignments and announcements to your students in a safe, accessible way. When you’re back to school, Google Classroom is the perfect way to organize digital materials to deliver and differentiate instruction. In order to use Google Classroom effectively, it’s important to understand how to upload work to students.
Classwork Tab
Once you log into Google Classroom, go to the Classwork tab. This is the place to upload assignments and assign work to your students. Google listened to feedback from teachers and rolled out the Classwork tab this year to make things even more organized!
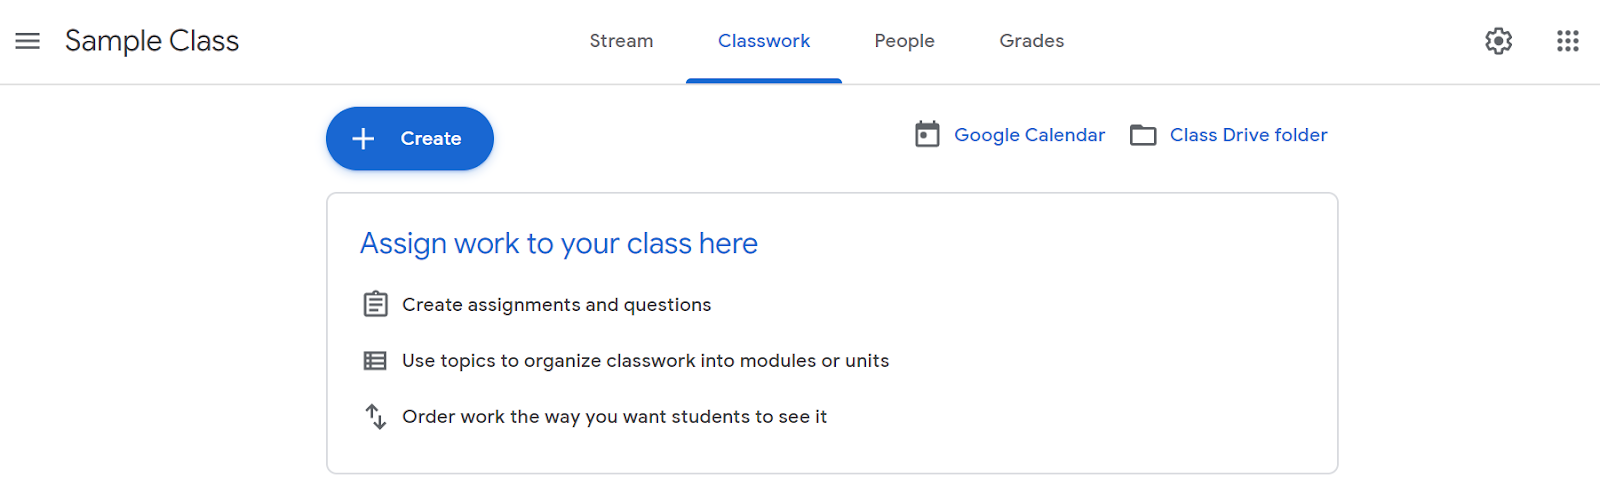
The Classwork tab allows you to:
- Create assignments and questions
- Use topics to organize classwork into modules or units
- Order work the way you want students to see it.
Create Assignments
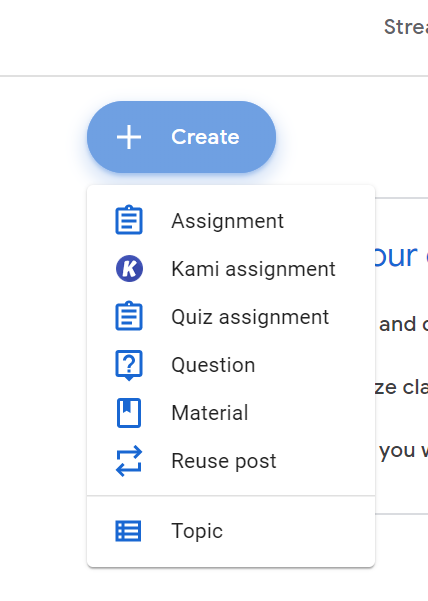
When you click on “Create”, you’ll see a dropdown menu. The options include:
- Assignment
- Quiz Assignment
- Question
- Material
- Reuse post
- Topic
If you have Chrome extensions (like Kami, a PDF reader and annotator) enabled, you may see additional options.
Uploading Assignments
The most common option to choose is assignment. After clicking on assignment, you’ll see the following menu:
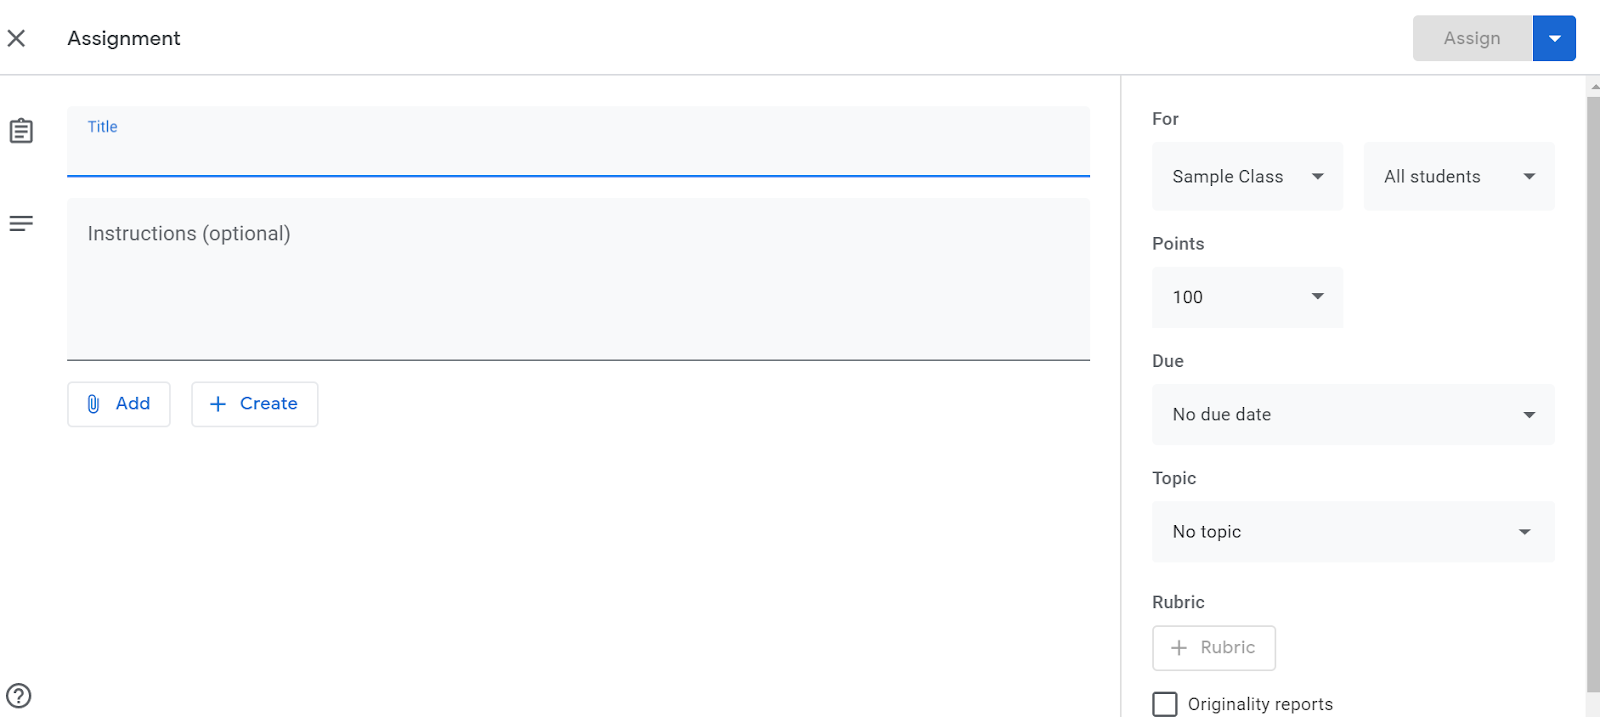
First, you will give your assignment a title. Next, include instructions if applicable. I like to use the same basic instructions that I include at the beginning of the Google Doc, PDF, or Google Slide presentation I upload. Then, choose the class you want to share the assignment with. If you have multiple classes, you can select them all at once. Next, if you are differentiating assignments, you may choose specific students to share with. In addition, you may select the number of points and the due date for your assignment. Finally, you will choose the “Topic” for the assignment. This is important when it comes to organizing units in Google Classroom. If you have a rubric, you also may attach it from this screen.
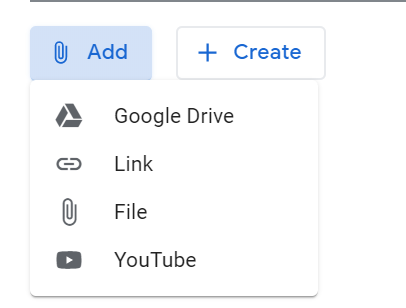
Clicking on the Add button will allow you to add files from Google Drive, links, files from your computer, or YouTube videos.
In addition, the Create button gives you the option to start a new document directly from Google Classroom.
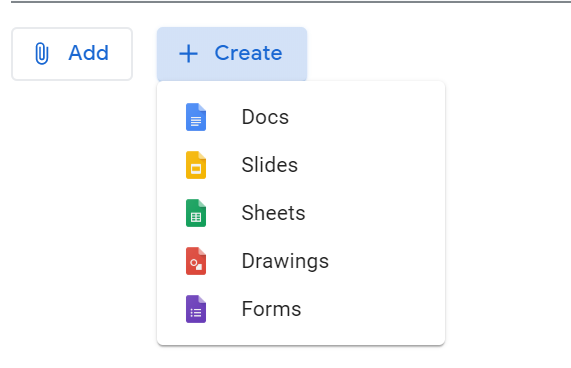
Options include:
- Docs
- Slides
- Sheets
- Drawings
- Forms
Assigning Google Slides
Most of the time, I prefer to deliver content via Google Slides. Slides are so versatile! You can assign a whole slide presentation for students to view for information, make a copy for each student, or allow all students to edit the presentation. This is perfect for collaboration and group work!

To assign a full slide presentation, either “Add” or “Create” the assignment, then choose one of the options applicable for the given assignment.
One assignment you might choose to post as “Students can view file” are the Daily Math Prompts. These at-home math prompts give something for students to solve and discuss with family members. They are perfect for math conversation starters at home!
When choosing “Students can edit file”, you’re giving every student in the class or group the option to add or edit. This is perfect for sharing a template or blank slide presentation where students are collaborating, solving problems together, or creating their own presentations.
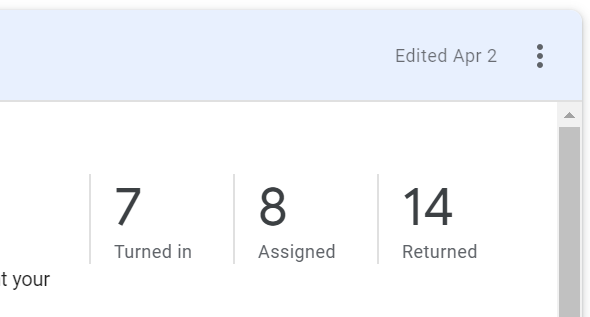
The option I use most often is “Make a copy for each student”. Students are able to edit their own individual copy of the slides, which lists their name at the top. You can then see work by clicking on the assignment in the Classwork tab. You can see which student turned in the assignment, which ones have not been submitted, and the number you’ve returned.
Assigning Certain Slides
Maybe you don’t want to assign an entire Google Slide presentation to students. For example, my Power Problems encompass enough word problems to get students through the whole year! Rather than share the Google Slide presentation in its entirety, you may choose to share one unit or several problems.
There are two ways to complete this:
First , to assign certain slides, you can “Make a Copy” of your slide presentation and delete all the slides you don’t want students to complete. Make sure to keep your original presentation when you want to share future slides.
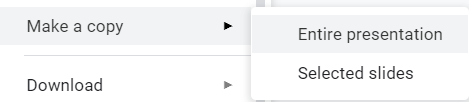
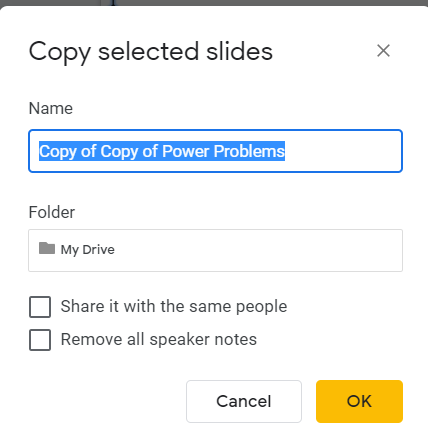
On the other hand, you can select particular slides just by clicking on them within the presentation. You can then make a copy of just those selected slides.
Once you select what slides you want to assign, you assign the Google Slide presentation the same way you would assign a full presentation.
Submitting or Turning In Work
In order for student work to appear completed in your Classwork or Grades tabs, students simply click “Turn in” to submit an assignment.
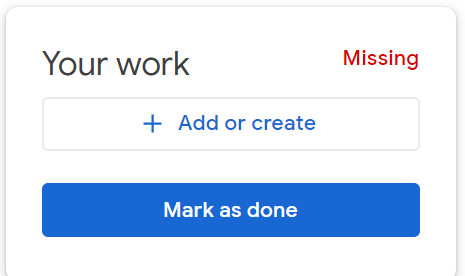
In the grade tab, you’ll see each student’s name on the left-hand side. On the top, the assignments are listed. An assignment will be marked “missing” if it’s not turned in by the due date, “turned in” if it’s been submitted but not yet returned, and a checkmark if you returned the assignment.
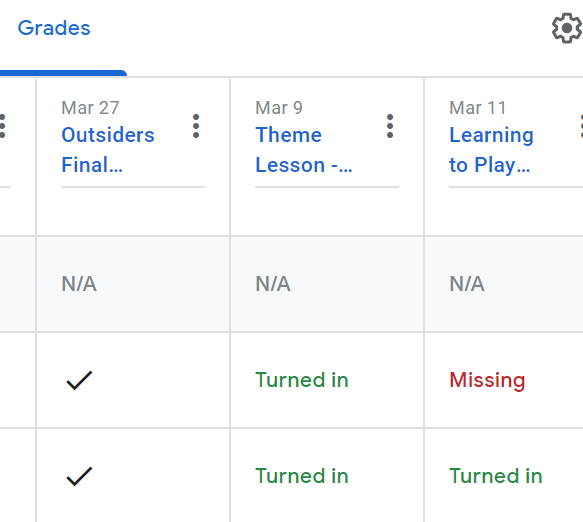
Remind your students to click turn in on an assignment. Many students who have assignments listed as “Missing” may have the work completed but did not submit it properly.
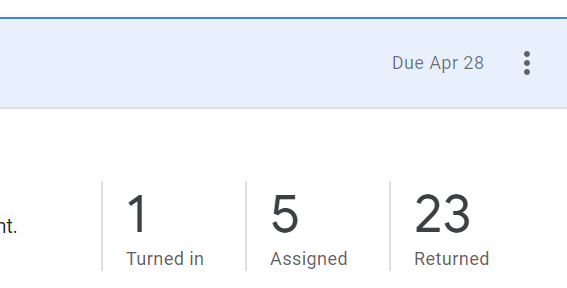
On the Classwork tab, you’ll be able to click on the “Turned in” assignments to see who submitted the work.
If you do not have an assignment for the students to submit but want them to mark something as complete, they may mark their work as “Done”. For example, if you ask students to read an independent novel for 20 minutes or talk to their parents about a math problem. This could be used for performance or “on your honor” tasks.
Uploading work to students in Google Classroom is simple once you get the hang of it! I love using Google Classroom to organize work and help my students keep learning and growing during this time of remote learning!